PES Modding Tutorial #2
Previous Tutorial (PES Modding Tutorial #1)
How to create a new player (Replacing or with new ID)
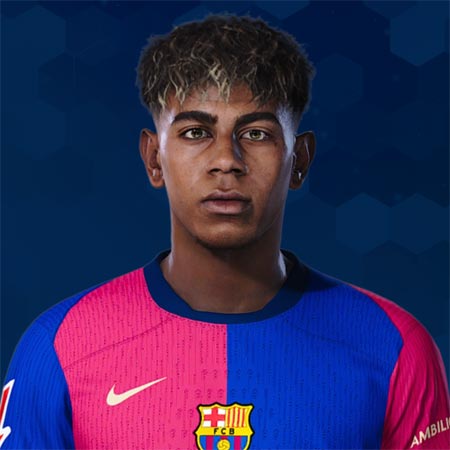
Lamine Yamal face, who doesn't exist in PES2021
What do you need?
Requisites:
- Having read / watched the first tutorial or know how to use PES2021 Editor by ejogc327 properly.
Game:
- A PES2021 CPY or Steam Version in your PC.
Tools:
- HxD Hex Editor (maybe not necessary)
- GzsTool (maybe not necessary)
1. Downloading the player we want to add face
For this tutorial, I'm going to use Lamine Yamal face by Nabilemu, but you can explore PES Forums to find any player's face that you want to add to the game.
2. Creating a new player in PES Edior
Open your PES2021 DB in PES Editor and we are going to create a new player. If you don't have a PES2021 DB, follow the previous tutorial.
First we are going to search for an ID that is not being used, for example 7777. This ID should be in 100-100.000 range.

No results for ID 7777
You can also use a fake player from the PES fake leagues and replace it, if so you can skip this step and go directly to step 3.
Once we have a free ID we must create a new player, then fill the basic data (Name, Country, Position and Skin Colour, so it matches with the face). You can edit the player stats whenever you want but it's not necessary for now.

Remember to apply changes once you finish creating the player.
IMPORTANT: You may have noticed in the screenshot that the Edit Player and EDIT fields are marked and that you can't unmark them. That's because the screenshot is from before applying the changes. If you leave the automatic ID that the Editor puts into the player, it will remain marked. EDIT players are treated as players that you create manually in the game and can be buggy, also they will appear in Created Players section inside the game. For IDs in the mentioned range, the fields are unmarked, that's why we search for an empty ID.
3. Transfer the player to a team
Once our player is created we must transfer the new player to a team. To achieve this, we must go to the Transfers tab, search for the team we want in the left section and then search for the player in the "Find Players" section. Click in the marked arrow (with Team A marked) and the player will be transfered to the desired team.

After doing it, we save just like in the previous tutorial, delete the EDIT00000000 file and update the livecpk folder with the new changes in the DB.
4. Add the face to the game
Now, we are going back to the face we downloaded. First we create a new folder named "Faces" for example, which has te following route inside it:
Asset/model/character/face/real.
The player faces files go inside the "real" folder. This files can consist in a number (ID) folder and optionally a texture folder which is usually the player's name spelled with a limited amount of characters. We are going to relink the face id to the one we used to create the player. The are different possibilites:
(1) The face has a texture folder
In this case just rename the ID folder with the new ID.
(2) The face doesn't have a texture folder but the IDs one is the same length as my chosen ID.
If the default ID folder is, for example, 7511 and we want to use 7777, we must enter the folder, go inside "#Win" and you will see a file named face.fpk. Open it with HxD Hex Editor and search and replace (Ctrl + R) "7511" with "7777". There must be 2 ocurrences.

Save and open again the face.fpk but now with the GzsTool, and lastly rename the ID folder with the new ID.
(3) The face doesn't have a texture folder and the IDs one is not the same length as my chosen ID.
Same procedure as before but instead of replacing the ID with our ID replace it with a name of the same length, for example if the ID is 162114, replace it with lamine. Use GzsTool with face.fpk and then copy the ID folder and rename the copy "lamine", and keep only the folder "sourceimages" of inside. Change the original folder's name with the new ID. You can delete the sourceimages folder there.
With the required folders inside Faces/Asset/model/character/face/real/, copy Faces inside the livecpk folder and add the line
cpk.root = "livecpk\Faces"
in your sider.ini.
Now the new player will appear in the team where you transfered it, with the downloaded face!
Comments
Post a Comment